

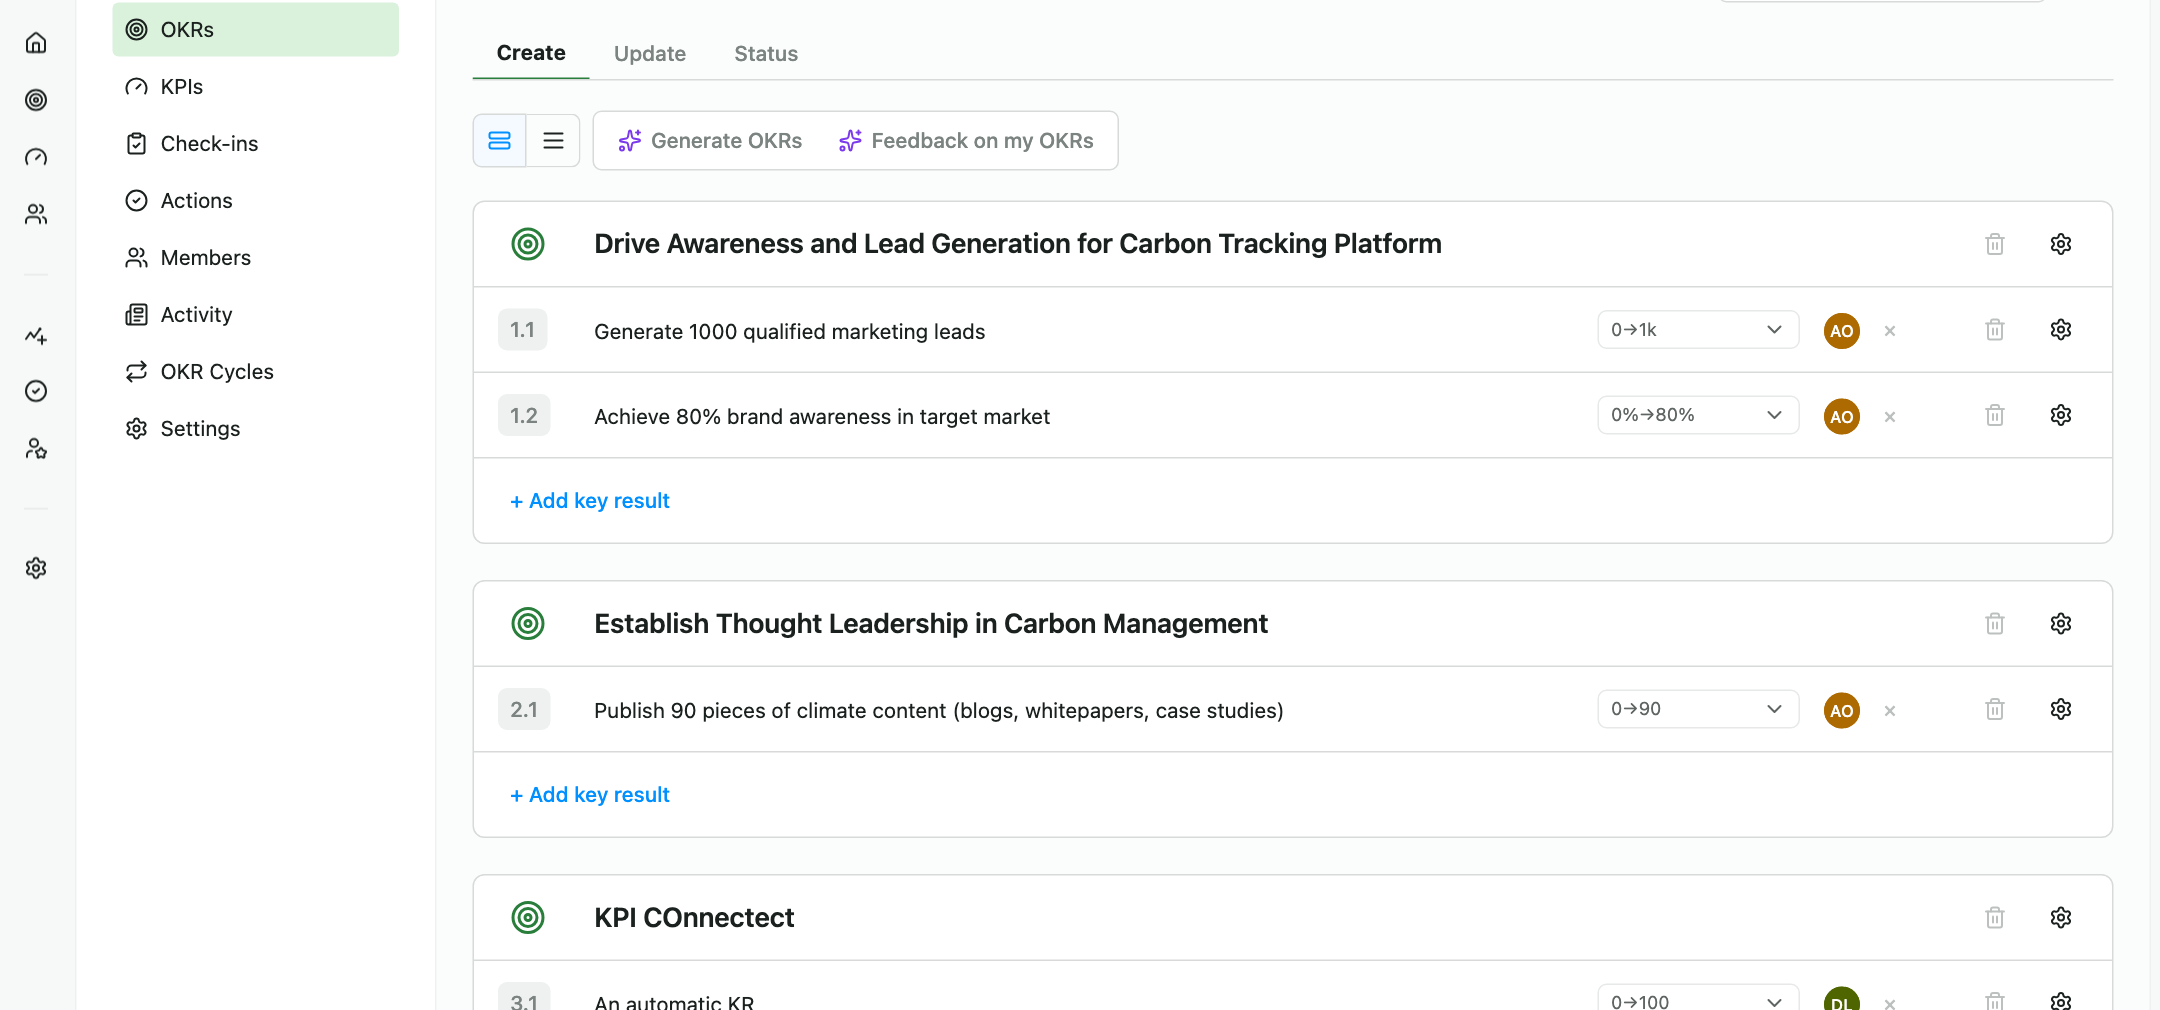
OKRs in OKRnest are created on the Create tab of a team's OKRs section. Each team has its own OKRs section where you add objectives and key results for a given cycle period.
Getting started
- Open your team from the Teams page (or from Your Teams in the sidebar)
- Select a cycle period using the period selector above the tabs (e.g. "Q2 2026")
- Make sure you're on the Create tab
The first time a team creates OKRs, the Create tab asks how you want to start. If the AI Assistant is enabled, Draft with AI opens the OKR coach; otherwise, or if you prefer, choose or write them yourself.
If the selected period doesn't have any OKRs yet, you'll see an empty state with an Add Objective button. If a previous cycle exists, you'll also see Copy OKRs from last cycle to quickly get started.
Drafting with the AI coach
With the AI Assistant feature enabled, the toolbar at the top left of the Create tab has two buttons:
- Generate OKRs opens a dialog where you describe What does your team want to achieve this cycle? Rough notes, strategy documents, or meeting minutes are fine. Provide more details reveals optional fields for why it matters, what success looks like, and supporting context. The coach also considers your previous cycle and your parent team's OKRs. Drafted OKRs appear on the right and can be added to the editor, then refined like any other OKRs. You can Regenerate OKRs if the first draft misses the mark.
- Feedback on my OKRs reviews the saved OKRs in the current cycle and gives coaching suggestions per objective. Save your changes first, then click Generate feedback.
Adding an objective
Click Add Objective. A new objective card appears with a text field where you type your objective title.
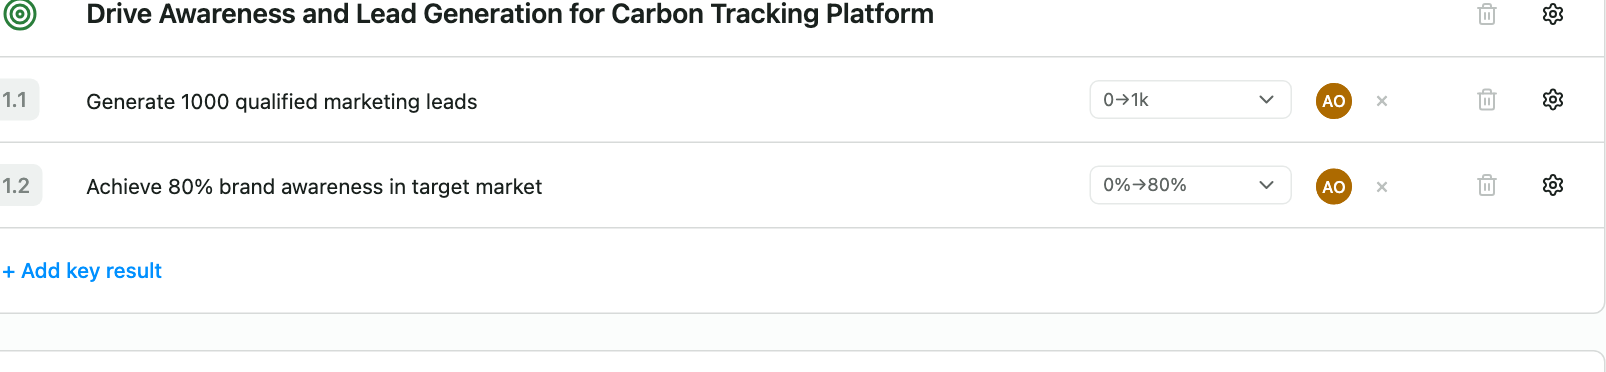
- Title: Type a clear, qualitative goal (e.g. "Increase customer satisfaction")
- Press Enter in the objective title field to immediately add the first key result beneath it
- Drag the handle on the left to reorder objectives within the cycle
You can add as many objectives as you need. Each objective is displayed as a card containing its key results. The toggle at the top left switches between a Comfortable and a Compact layout.
Adding key results
Under each objective, use Add key result to add a new key result. You can also press Enter in an existing key result's title to add the next one.
Each key result row has inline fields:

Key result fields
Title: Describe a measurable outcome (e.g. "Increase NPS score from 30 to 50"). The title field auto-expands as you type.
Type: Choose how the key result is measured. On a new key result the type control is on the row; after you save, change it under Key Result Settings (it saves immediately).
- Number: A plain number (e.g. 0 to 100 users)
- Percent: A percentage value (e.g. 0% to 100%)
- Currency: A monetary value using your organisation's currency (e.g. $0 to $10,000)
The type affects how values are displayed throughout OKRnest but doesn't change how progress is calculated. Existing values are not converted if you change type later.
From and To: Set the starting value and target value. Click the From/To button to open a popover with both fields and confirm with Done.
- New key results default to 0 to 100 with the Number type
- You can set any numeric values, including decimals
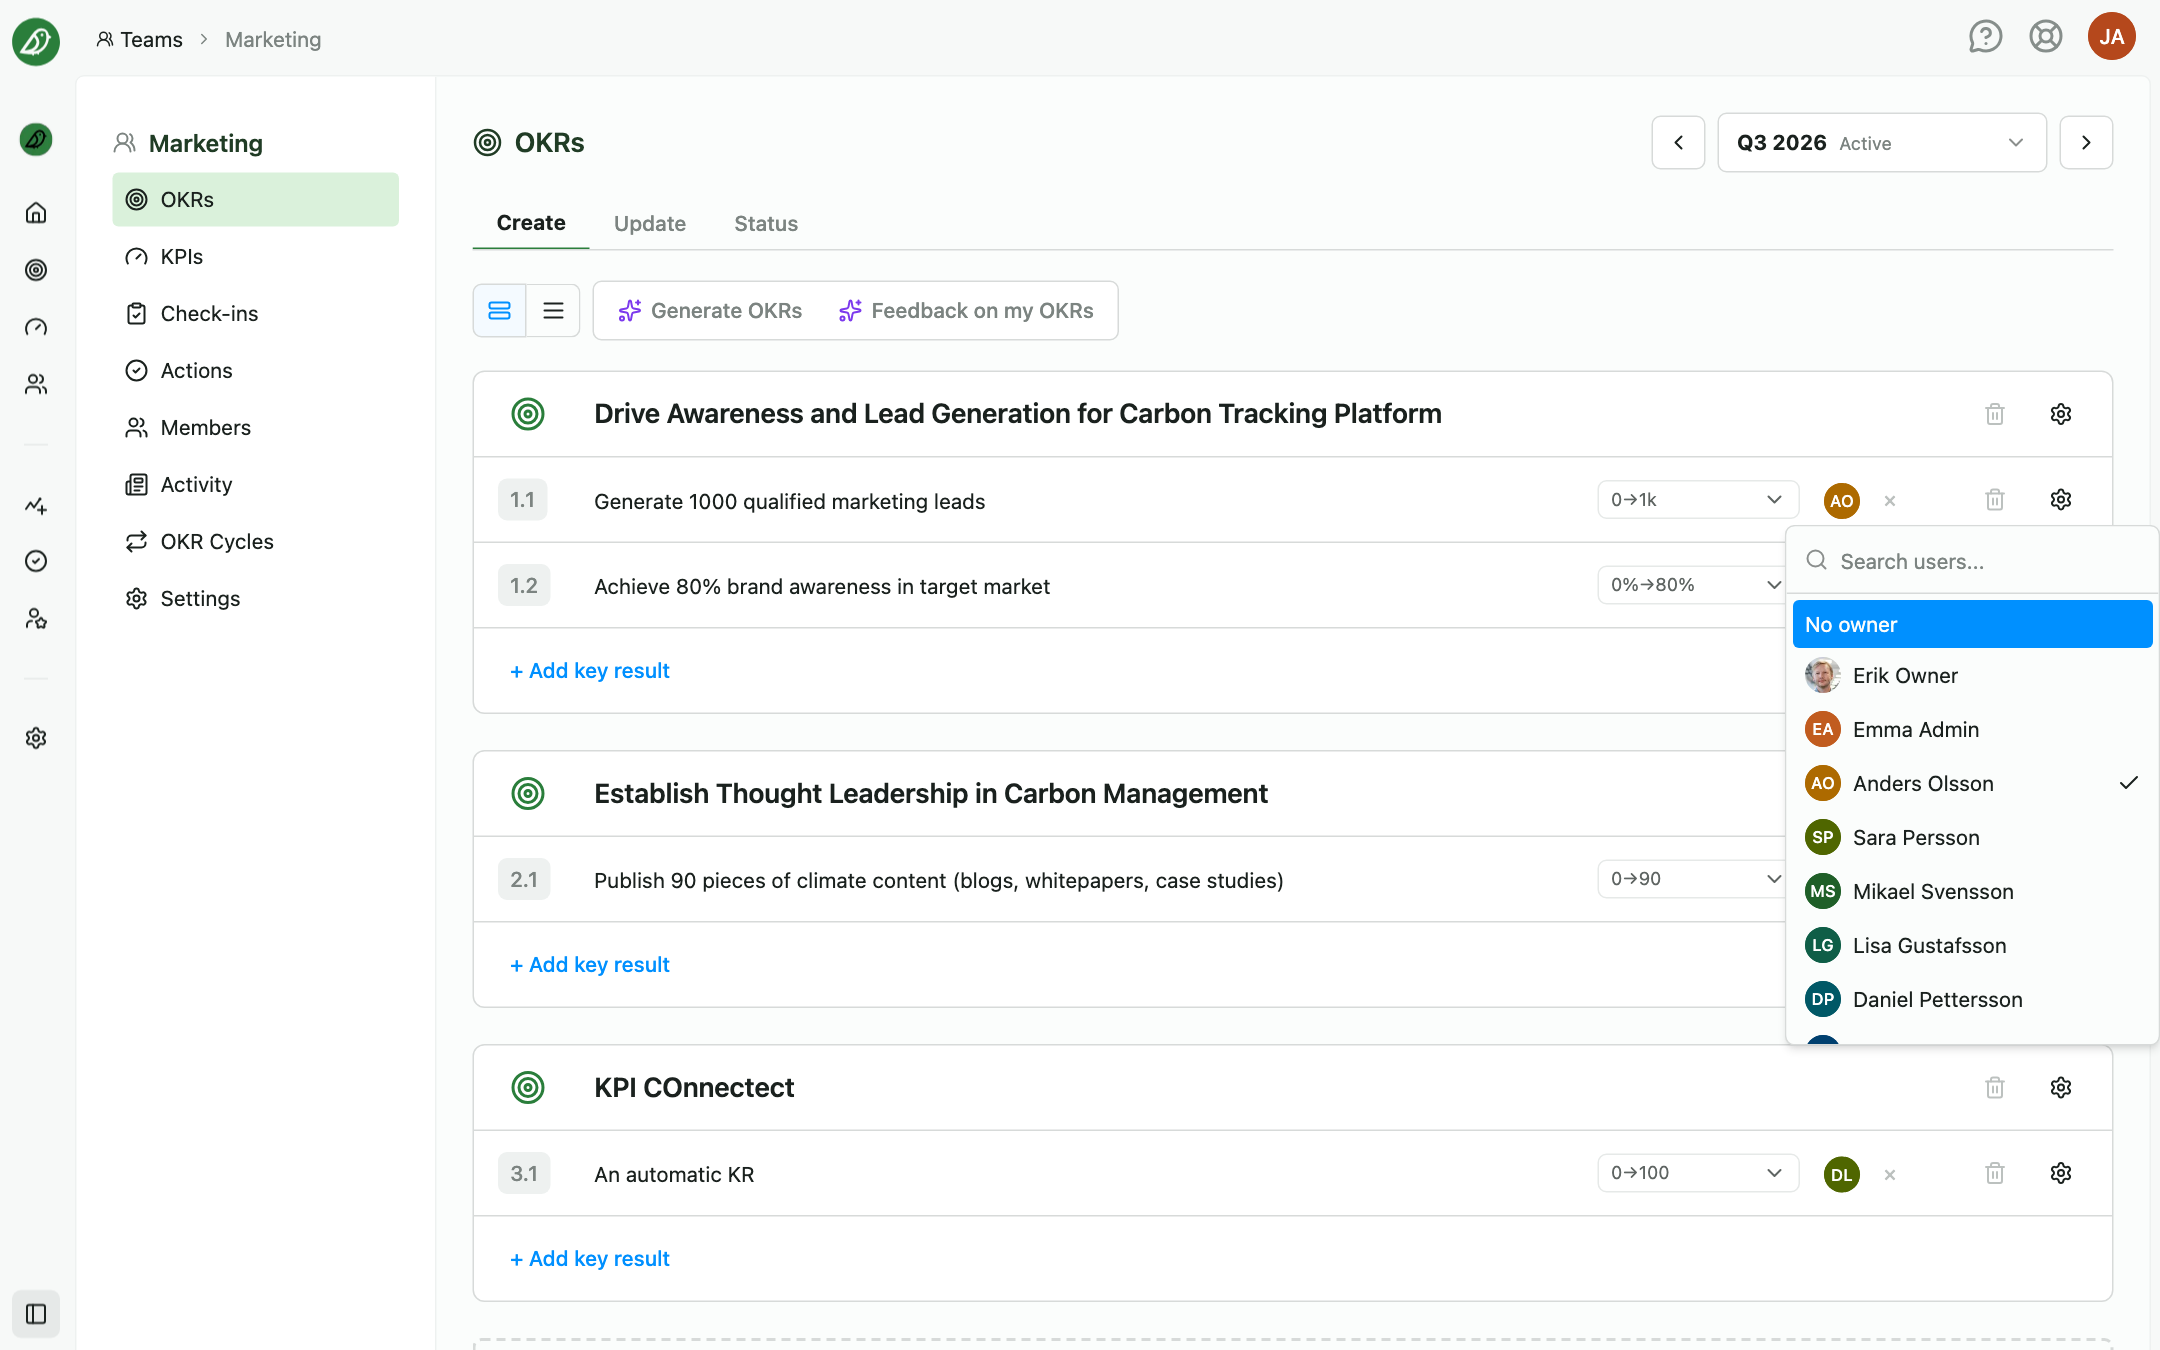
Owner: Assign a team member who is responsible for this key result. Click the owner field to see a dropdown of all team members. If you're an admin, you can also select Add new user to team to add someone directly.
Key Result Settings
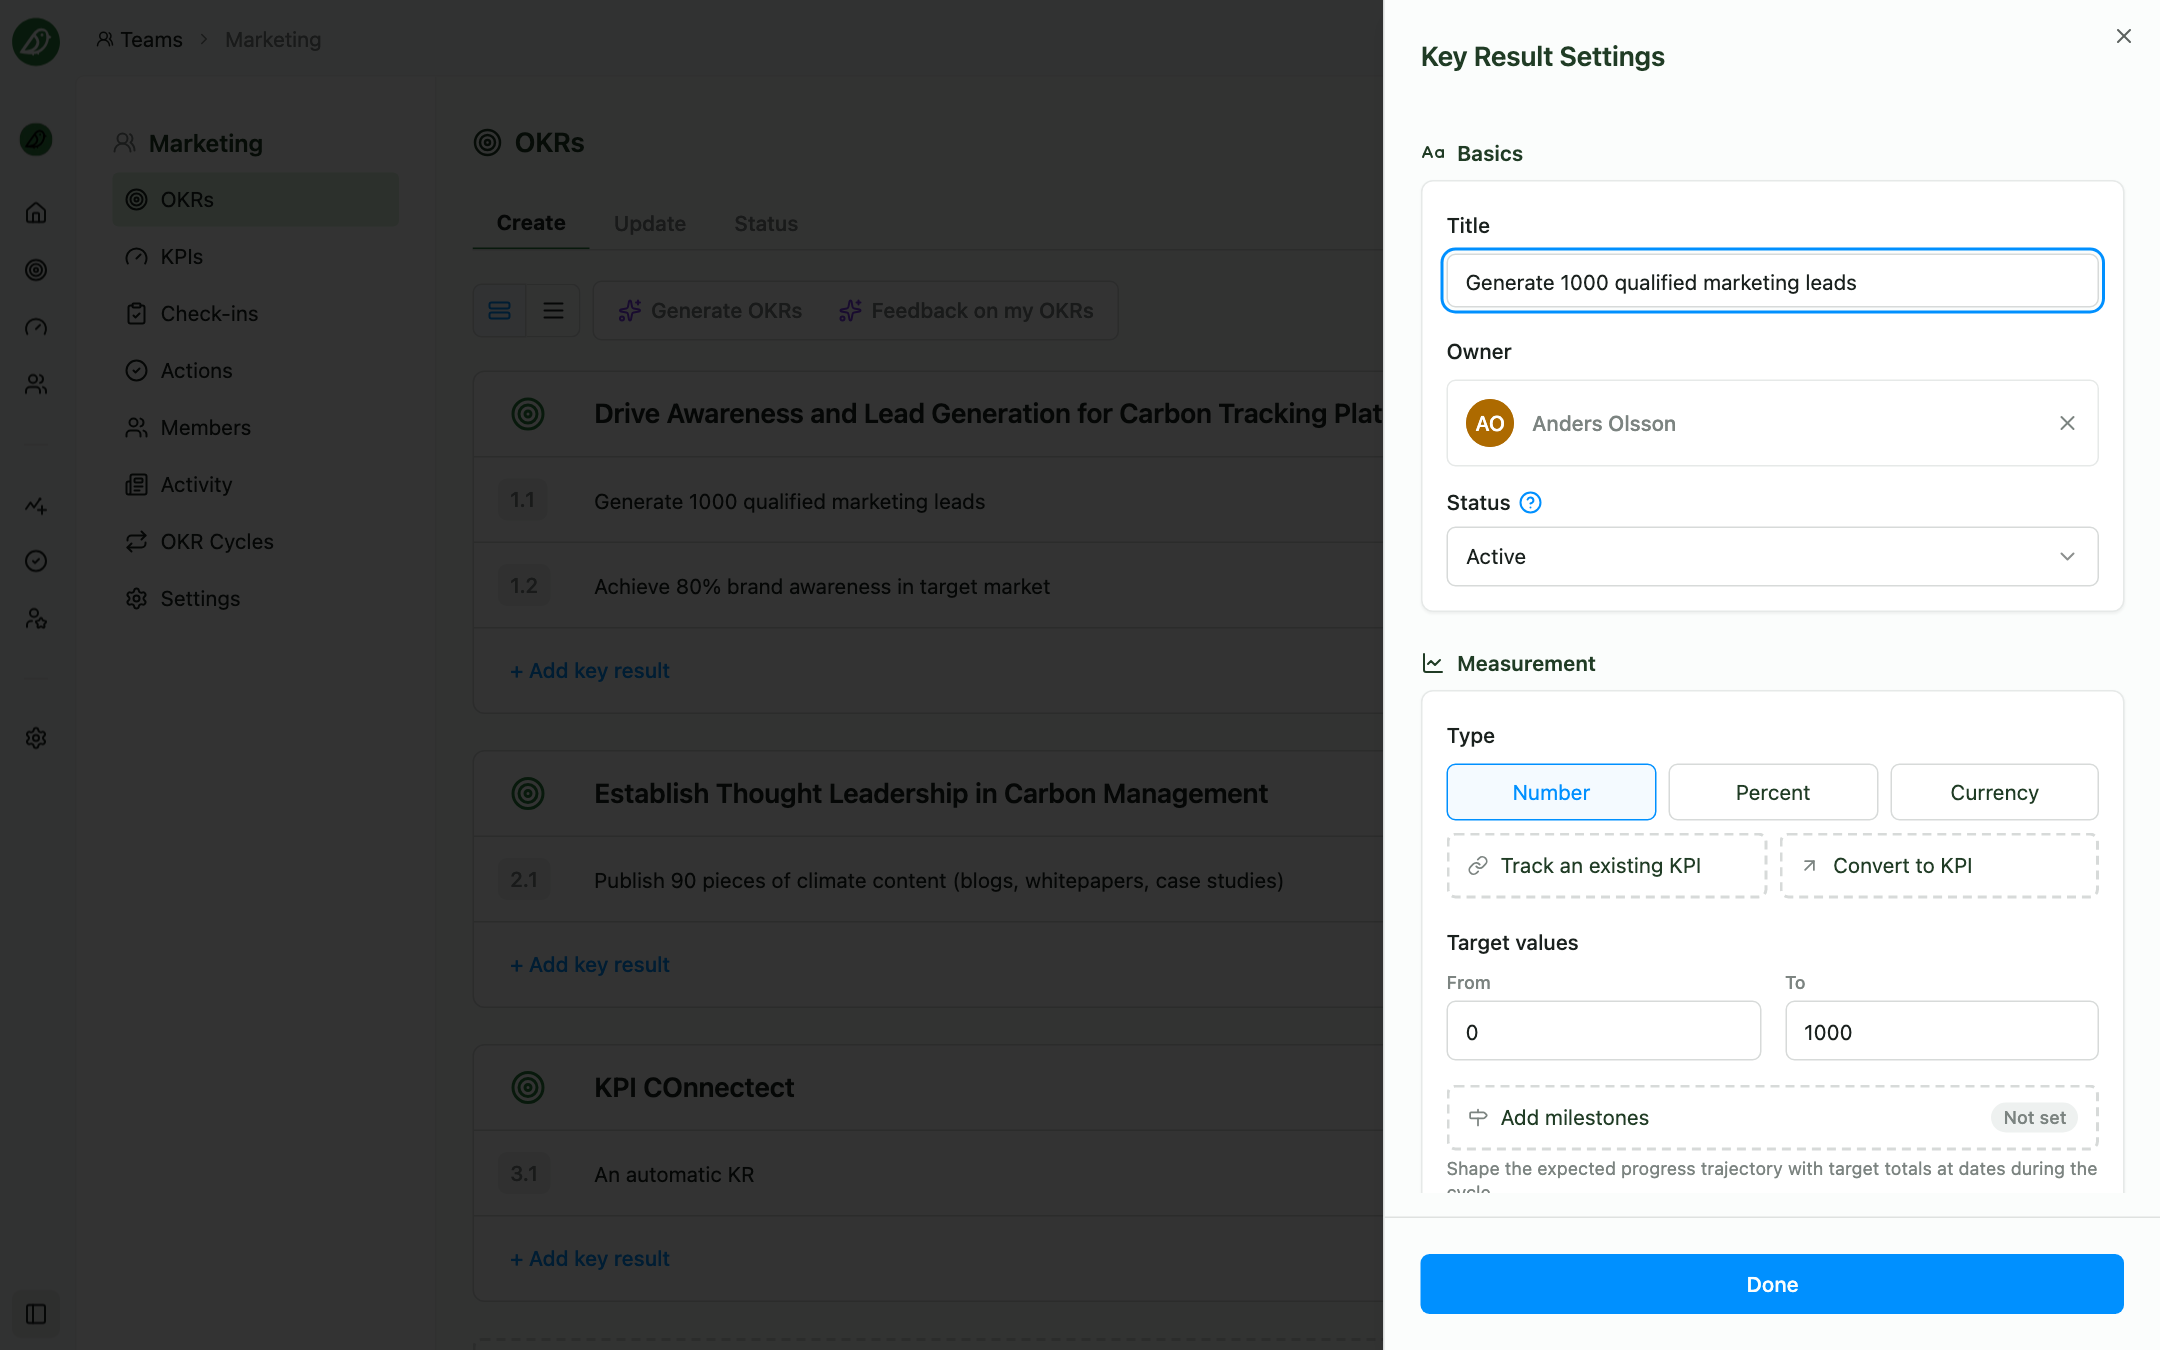
Click the settings (gear) icon on the right side of a key result to open the Key Result Settings panel. This side panel groups all key result settings into four sections:
Basics
Title: Edit the key result title in a larger text area.
Owner: Search for and select a team member. When an owner is assigned, their name and avatar appear. Click Remove owner to clear the assignment.
Status: (Saved key results only.) Set the lifecycle status to Active, Completed, or Abandoned. Completed and abandoned key results behave differently on update pages and in progress rollups. See Updating Key Results.
Measurement
Type: Choose between Number, Percent, and Currency using the three buttons. On a saved key result this control saves as soon as you pick a type. If the key result tracks a KPI, the section is labelled Metric and the type follows the KPI.
Beneath the type buttons are two options for measuring with a shared metric instead:
- Track an existing KPI: Connect this key result to a KPI from your organisation's catalogue so progress flows from the same metric across teams.
- Convert to KPI: (Saved key results with their own metric only.) Turn the key result's metric into a standalone KPI while keeping the key result linked to it.
Milestones: (Saved key results, when the Milestones feature is enabled.) Click Add milestones to set target totals at dates during the cycle. The expected-progress line then follows your planned trajectory instead of a straight line, which changes how the automatic traffic light judges pace.
Target values: Set the From and To values with separate input fields.
Updates
Update entries: Choose whether progress updates record an Absolute (new total) or an Incremental (delta) value.
Allow manual updates: (Saved key results with their own metric only.) When off, the value can only be set by APIs and integrations, and the key result is left out of update reminders. People can still comment and change status.
Include in progress calculations: A toggle that controls whether this key result counts towards the objective's overall progress. When turned off, the key result's weight is set to 0 and it is excluded from progress calculations.
Alignment
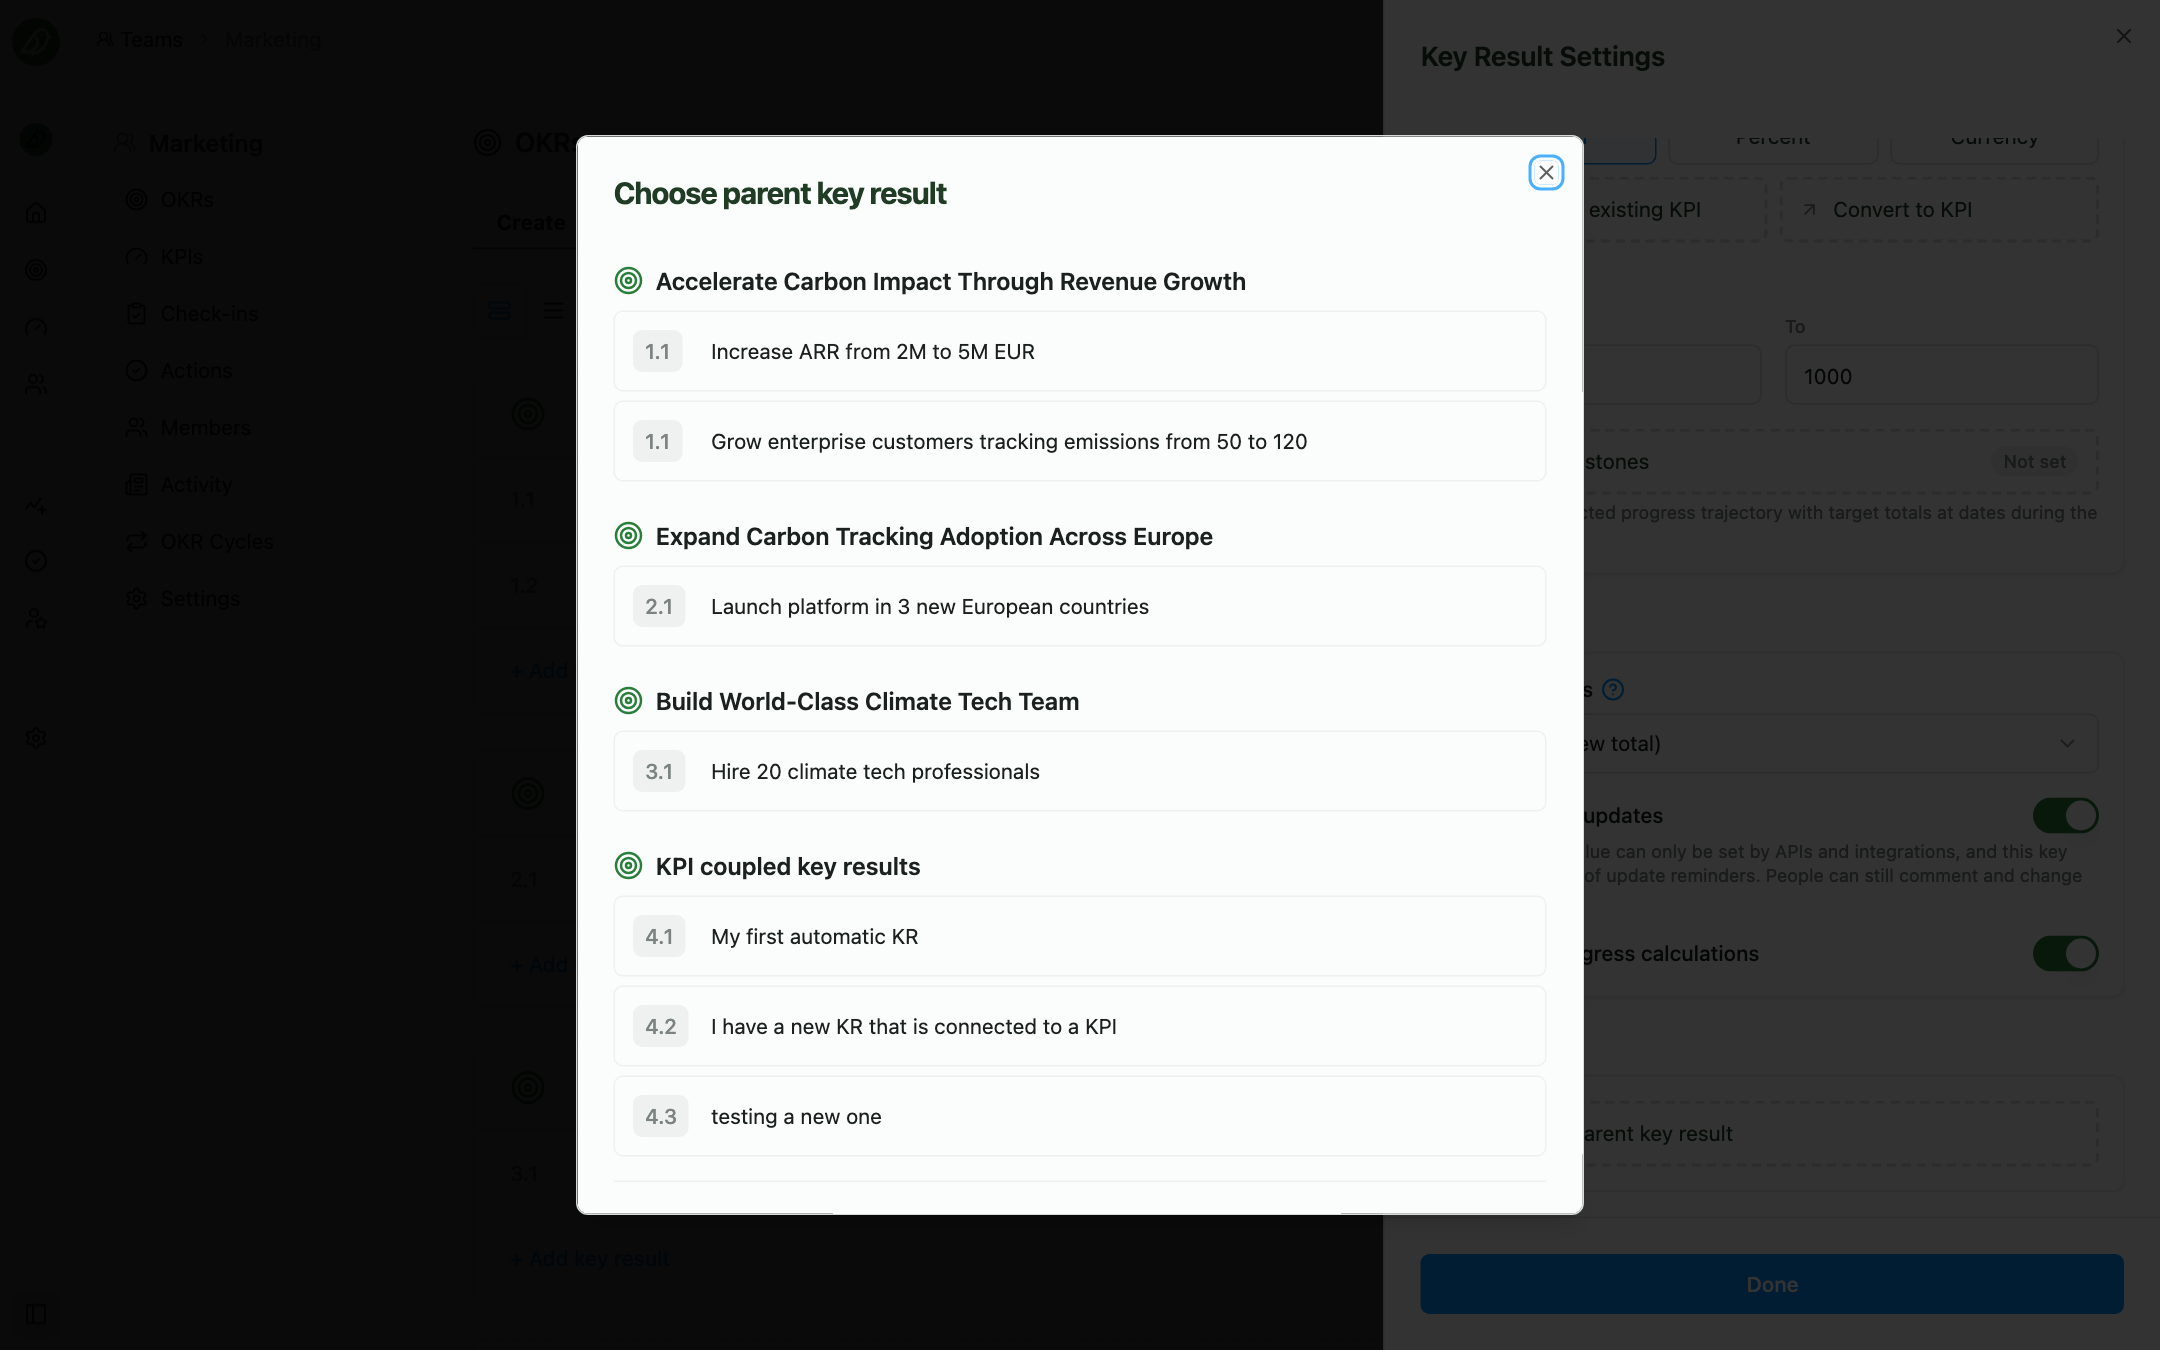
(Shown when the Align OKRs feature is enabled.) Link to parent key result opens a dialog showing your parent team's objectives and key results for the matching cycle period. Pick one to create a vertical alignment link that is visible on the Status tab, in check-ins, and on the alignment map.
Contributes to (objective alignment)
With the Align OKRs feature enabled, each objective has an Objective settings menu (the gear icon in its header) with a Contributes to item. This lets you link your objective to objectives from other teams, establishing cross-team alignment.
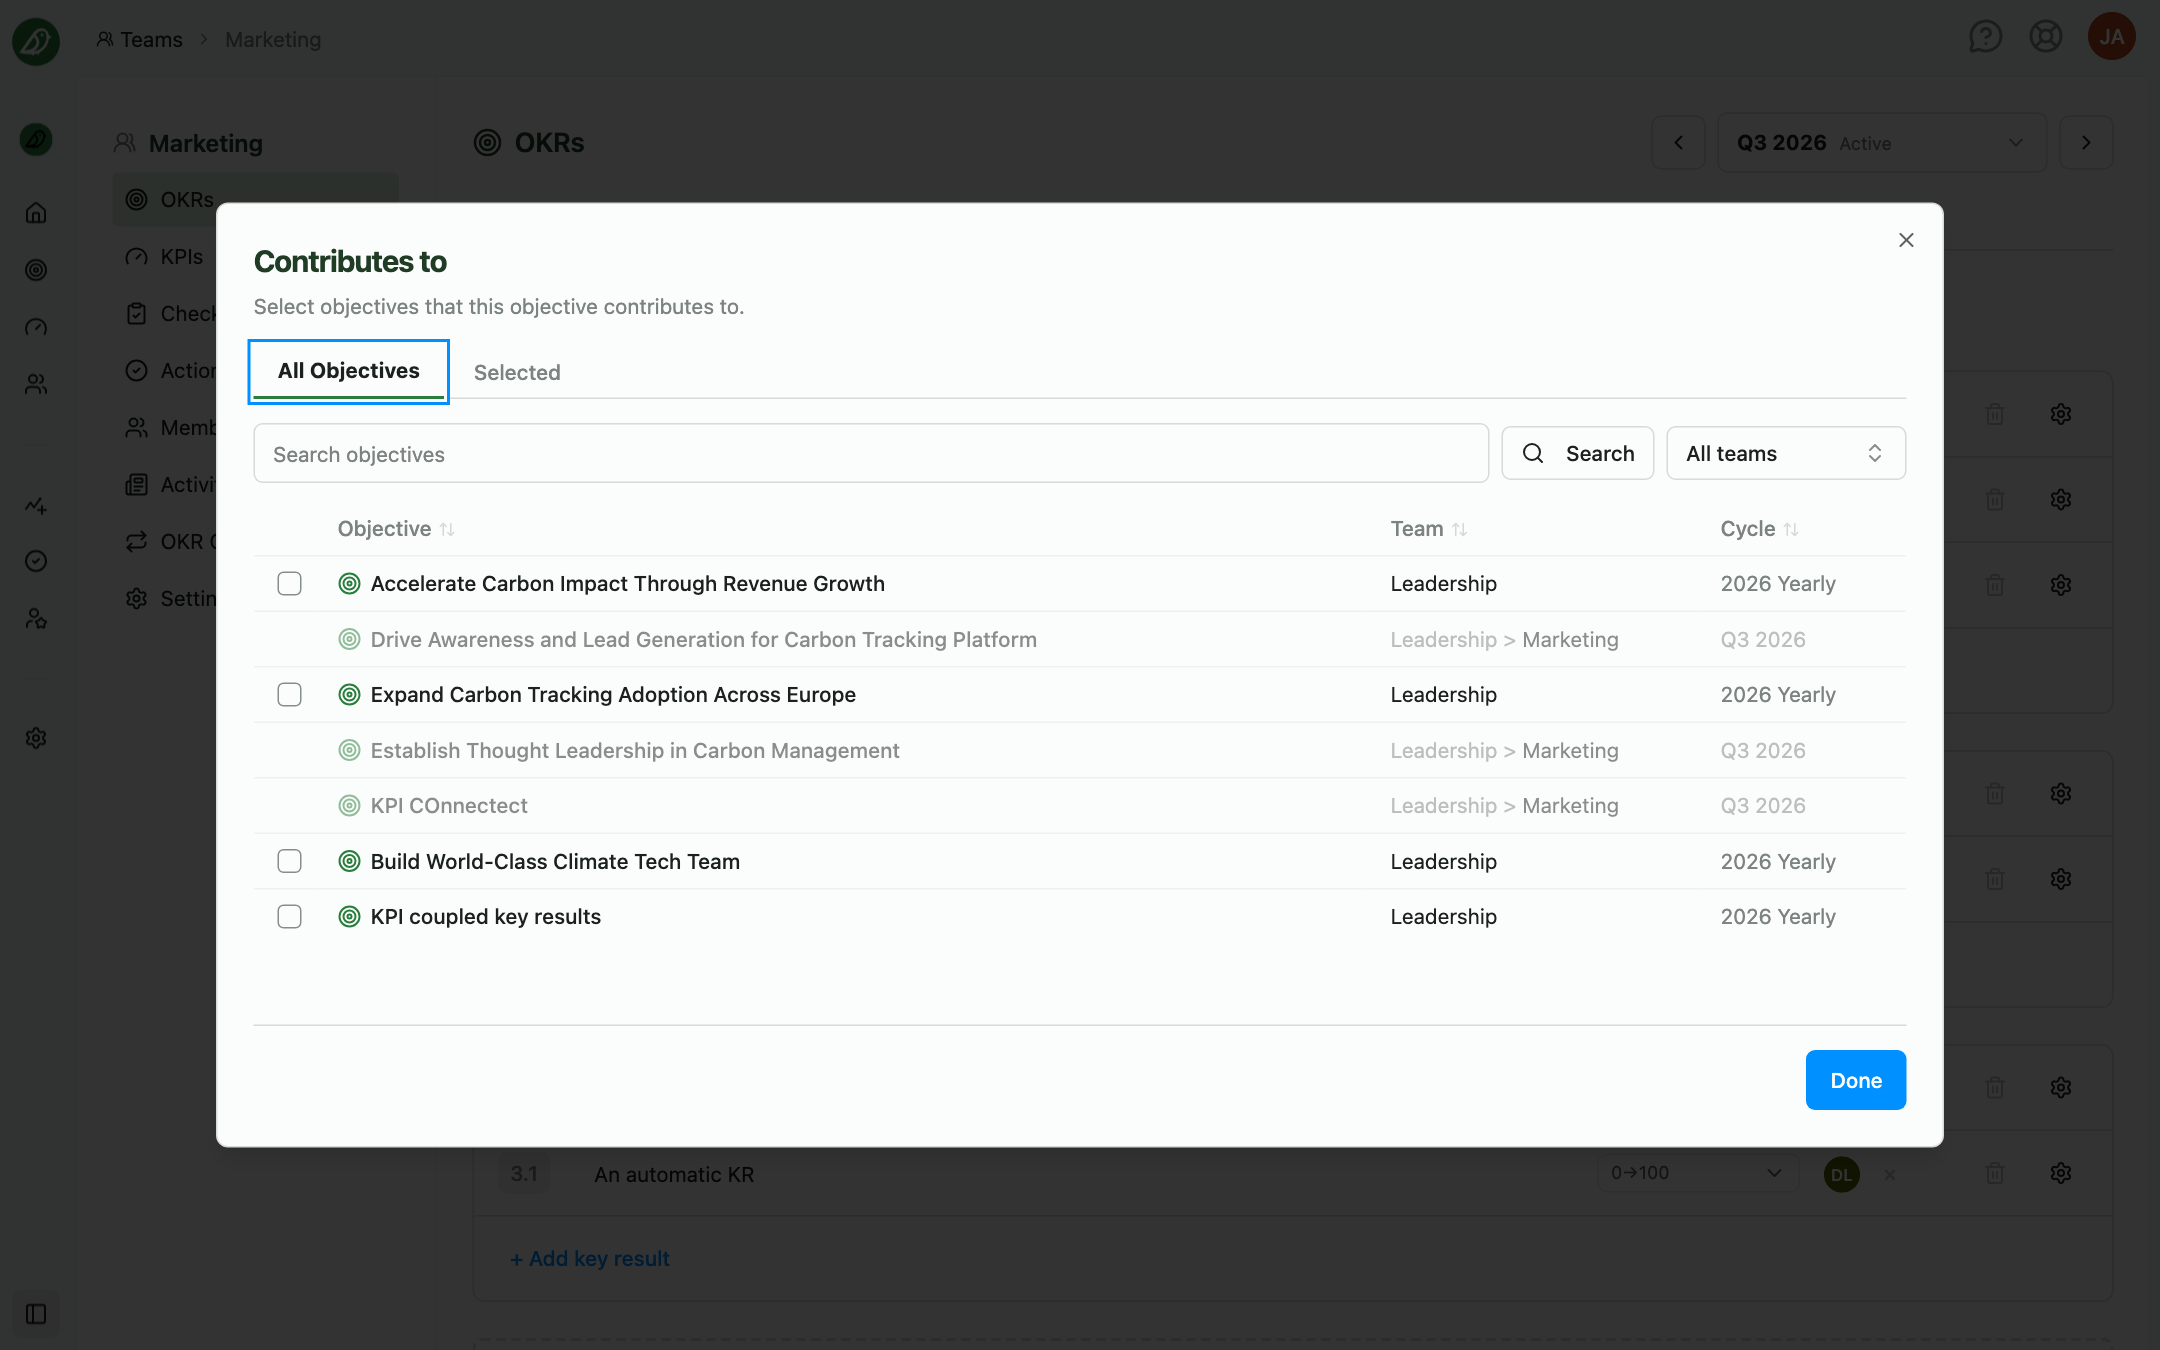
The dialog lets you:
- Browse objectives from all teams in the current cycle period
- Search by objective title
- Filter by team using the team dropdown
- Select multiple objectives that your objective contributes to
The dialog has two tabs: All Objectives shows all available objectives, and Selected shows only the objectives you've chosen. Click Done to close it. The menu item shows how many objectives are linked, for example Contributes to (2).
Reordering with drag and drop
Both objectives and key results support drag-and-drop reordering:
- Objectives: Drag the handle in the objective header to move it up or down
- Key results: Drag the handle on the left side of a key result to reorder within the same objective
Key results can only be reordered within their parent objective. You cannot drag a key result from one objective to another.
Deleting and restoring
- Click the trash icon on an objective or key result to delete it. Saved items are marked as inactive and shown with reduced opacity until you save
- Click the restore icon on a deleted item to bring it back
- Delete permanently removes a saved item together with its updates and check-in notes after a confirmation. This cannot be undone
- Brand new items (not yet saved) are removed immediately rather than marked inactive
Saving your work
The buttons at the top right of the Create tab depend on the cycle status and whether you have unsaved changes:
New or draft cycle:
- Save as draft: Creates or keeps the cycle in draft status and saves all objectives and key results
- Publish: Saves and sets the cycle to active
- Discard: Reverts all unsaved edits
Active cycle:
- Save changes: Saves your edits to the already-active cycle
- Discard: Reverts all unsaved edits
When an active cycle's end date has passed, the bar reads This cycle has ended with an Archive cycle button.
You can also use the keyboard shortcut Cmd+Enter (Mac) or Alt+Enter to save quickly.
If you try to navigate away with unsaved changes, an Unsaved changes dialog asks whether you want to Stay or Leave.
Tips for creating effective OKRs
- Keep objectives qualitative and inspiring: They should describe the outcome you want, not a metric
- Limit objectives to 3 to 5 per cycle: Focus drives better results
- Make key results measurable: Each one should have a clear number that defines success
- Assign owners: Individual accountability ensures key results don't fall through the cracks
- Use Contributes to: Linking objectives across teams makes alignment visible to everyone
- Start with Save as draft: Collaborate on your OKRs before publishing to the team